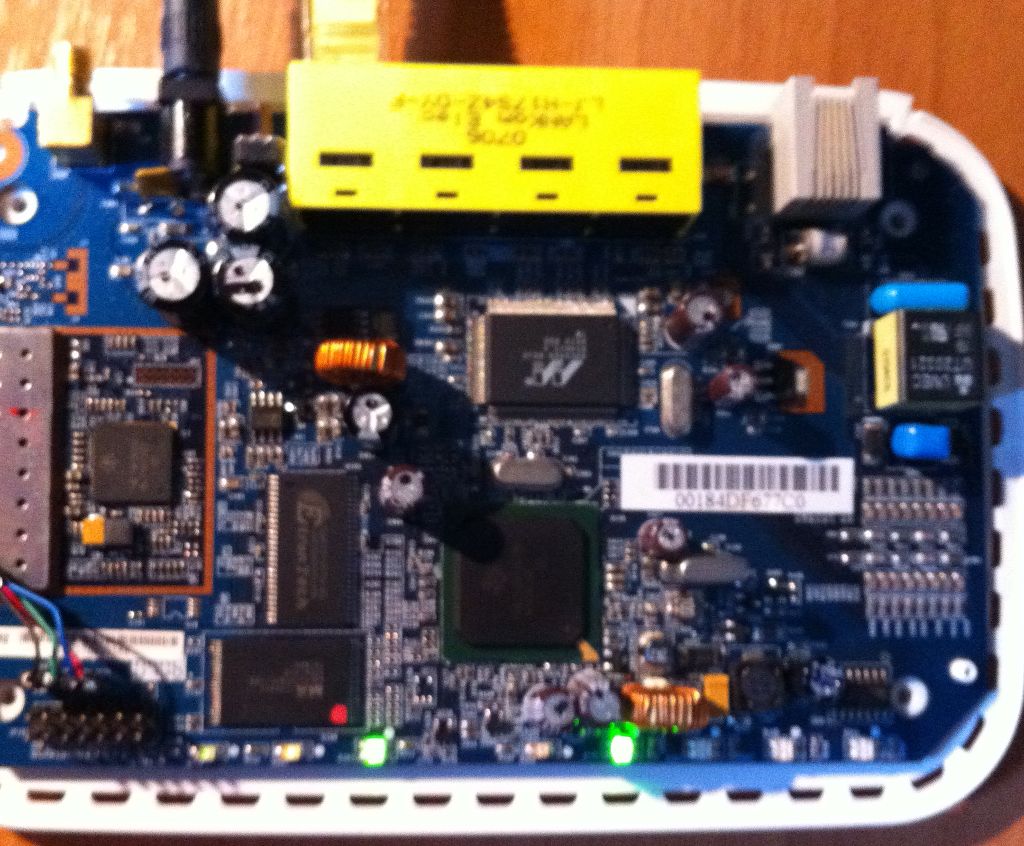
I’ve been working with openwrt lately and decided to try and get it running on an old-ish Netgear DG834v3. This Adsl2 modem/router is built around a TI AR7 SoC.
I found a large amount of informative resources on the openwrt wiki and various other sites and blog posts.
One of the most useful blog posts I found was:
I’ve had great success with my DG834v3 and openwrt Backfire/Bleeding Edge using info from the above tutorial.
Serial Console
For the serial cable, which I consider the #1 priority for effectively doing any work, I hacked an old Nokia DLR-2L serial cable originally used for the Communicator 9210.
After cutting and stripping the communicator end of that cable, Green cable should be connected to RX (pin2) on the serial connector of the 834v3. Blue (MBUS originally) is VCC (pin3), Red goes to TX (pin4) and Black (GND) on pin1.
Using 115200,8,n,1 I got the serial working: 
Flashing openwrt
Initially, I didn’t bother changing the adam2 bootloader and flashed successfully backfire using Glen Pitt-Pladdy’s blog post (see link above).
Then I thought I could flash a newer image I built, using the same dd commands but /dev/mtd0 does not point anymore to 0x900d0000 after booting with backfire — instead it wrote 128blocks starting at 0x0 before it stopped (saying unable to write)
Result: adam2 lost its configuration and I could not recover even with netgear’s utility.
PSP Boot over jtag
In order to flash PSP Boot I had to build a jtag cable.
For the jtag cable I had only success building the xilinx cable mentioned in the schematics found in the file jtag-acorp.png under the schema directory in this archive:
http://mcmcc.bat.ru/acorp/utils/acorp-jtag-v.4.8_MC02.tar.bz2
For flashing PSP Boot I installed Ciclamab in a Windows XP machine. Without the need to load anything else (loadio / giveio.sys as mentioned in other tutorials) I had success flashing pspboot by using the debrick-mod.exe command found under the Ciclamab installation directory:
debrick-mod.exe -flash:custom /start:0x90000000 /length:0x00020000 /window:0x90000000 /f:pspbootimagefile /xilinx
This autodetected the flash chip and finished with the second attempt. The first attempt stopped at 2%. The second attempt was more successful. It took about 15 minutes to finish though!
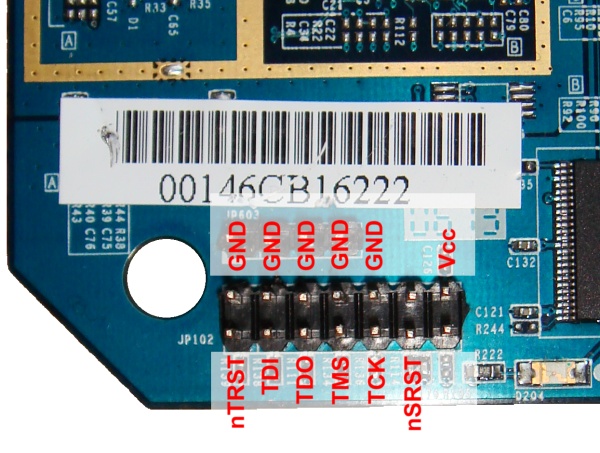
Btw in order to avoid interference problems I made the jtag cable really short (a bit over 5cm). Another, not so easy to find, piece of info is the pin arrangement of the jtag port on the DG834v3.
It can been seen here:
http://wiki.openwrt.org/doku.php?id=oldwiki:openwrtdocs:hardware:netgear:dg834v3
or, in case the openwrt wiki disappears I am attaching the same picture here:
I’d like to hear from anyone who has successfully jtagged from Linux.
PSP BOOT is different!
Another point of interest is that from a console point of view the default parameters of PSP Boot are 9600,8,n,1 so you need to adjust your term settings to be able to use the console after jtagging the new bootloader.
You can adjust the serial speed later on from the PSP Boot menu using the MODETTY0 env variable:
(psbl) setenv MODETTY0 115200,8,n,1
Conclusion
Given the amount of trouble adam2 can cause, I think the first steps ought to be:
- Build the serial console cable
- Boot the modem with the original firmware and enable debug mode
- Back up the original mtd contents (/dev/mtdblock/[0,1,2,3,4] )
- Write pspboot on /dev/mtdblock/2
- When done, poweroff, power on and hopefully you have a working pspboot.
That way building a jtag would not be necessary, unless step 5 fails in which case you’d be forced to flash the bootloader over jtag.

Well, shoot. Exacly same mistake here.
Could you please reveal where you found the pspbootimagefile?
Thanks,
Tobi
P.S. I know the entry is old, but thought I might try…
Hi Tobi, thanks for reading my blog.
The file I used is psp_boot_Acorp_W400G-1.4.0.4.bin
I think I picked it up by registering into this forum:
http://www.routertech.org/viewtopic.php?t=2797
If you are still having troubles let me know.